Saturday, December 31, 2011

Asian Chex Mix

A quick, easy, and always tasty party snack, Chex Mix, done up in a whole new way. Sweet, salty, and savory, I have forever loved "Asian" Chex Mix and searched far and wide for a killer recipe to satisfy my quite serious addiction to this crunchy treat. There are tons of possible variations of this snack, types of cereal used, balance of sweet-salty, spice factor etc... but this happens to be my favorite.


Asian Chex Mix
adapted from food.com 

Ingredients
4 cups Rice Chex Cereal
3 cups Corn Chex
3 cups Wheat Chex
2 cups Quaker Oatmeal Squares
2 cups pretzels
2 cups Bugles
1/2 cup unsalted butter
3/4 cup granulated sugar
3/4 cup light corn syrup
2 1/2 tablespoons soy sauce
2 tablespoons worcestershire sauce
1/3 cup oil
1/2 of a 2 oz bottle of Nori Goma Furikake
*I did not do this, but in the future I'll add at least 1 tsp of red chili flakes to bump up the flavor.


Preheat oven to 250 deg F. Line two large baking dishes with aluminum foil sprayed with cooking spray.

Mix cereals, pretzels, and bugles in a very large bowl.


Melt butter in a small to medium sized sauce pan. Add sugar and stir until dissolved. Add corn syrup, oil, soy sauce, and worcestershire sauce. If you choose to add chili flakes, add these as well so their flavor infuses the sauce. Stir until well blended.

Pour over cereal, mix until sauce is well distributed and no piece is left out of the saucy-goodness! Sprinkle on furikake and mix well.


Distribute cereal into the two baking pans. Bake for 1 hour, stirring every 15 minutes. This is very  important! If you don't stir or choose to just lazily toss a few pieces around the pan (which I may have done once or twice...) you'll end up with a burnt bottom layer of Chex Mix.

Let cool on foil over wire racks, then transfer to a large bowl to cool completely. Store in an airtight container (if you have any left!!!).


I hope your new year is filled with as much happiness and delicious goodies as I know mine will be! :)

Friday, December 30, 2011

Pioneer Woman's Cinnamon Rolls


Amidst the excess amount of overindulging that goes on during the holidays, who doesn't need an over-the-top, sugar-explosion of a breakfast to take your indulging to the next level?

I've been eyeing Pioneer Woman's (one of my new favorite people) cinnamon roll recipe for way too long to not have made them yet. After watching an episode of her show the other day featuring the scrumptiously sinful breakfast of my dreams, I absolutely had to give in to my ooey-gooey-buttery- sweet-maple craving.


The original recipe makes 8 pans of cinnamon rolls, and there was no way I was going to let myself have that many irresistible rolls in my house, so unless you have lots of people to give them to, I suggest quartering the recipe like I did.

A few alterations for next time:

  • Cut back on the sugar. The frosting is so sweet that I thought the sugar in the cinnamon rolls could have been reduced by about 1/3.
  • Cut down on butter. I found that I only needed about 2/3-3/4 of the amount of butter the recipe called for to spread over my dough.
  • Don't roll the dough out as long, instead roll it out wider. I was expecting gigantic mounds for cinnamon rolls, but instead got pretty small ones. Not to say they weren't just as tasty. 
  • *note- The recipe calls for 1 bag of powdered sugar to make the maple frosting. I took that to mean 2 lbs, and my frosting turned out just fine. 

Eat these right out of the oven with a cup of coffee and I'm sure they will become a staple breakfast for those mornings when you want an extra special treat. 

Thursday, December 8, 2011

This College Girl Cooks- Wholesome and Sweet Oatmeal Pancakes


Having been busy busy busy with finals week, moving to a new apartment, and planning for winter term in addition to the less-than-motivating freezing weather, I've sadly been neglecting my blog, but now that finals are over and all I have to worry about is what fun things to plan for my winter break (can't wait to be home! and warm...) I finally have time to post!

With three final exams and two papers all crammed into a short four day span, these past few days have been some of the most exhausting and stressful I've had in awhile. To help keep me going, I invented a new breakfast treat that has now become one of my favorites! Healthy, filling, warm, and guiltlessly decadent, my oatmeal pancakes are exactly what I needed to make it through finals week, but are so delicious that they've officially earned a permanent place in my breakfast regime. With their creamy, slightly sweet oatmeal banana center and golden-brown crust, these are the perfect meal for any oatmeal lover who wants a tasty, decadent breakfast without having to start off their day with a calorie-bomb. 

On a side note, these are also easily adapted for any vegan oatmeal and pancake lovers, just use your favorite dairy free milk and dairy/egg free pancake mix.

Wholesome and Sweet Oatmeal Pancakes
serves 1

Ingredients
1/4 cup old fashioned oats
1/4 cup your favorite pancake mix (I use Trader Joe's Multigrain Pancake and Baking Mix)
approx. 1/4 cup milk (usually slightly less does the trick)
1/2 banana
1/2 tbsp unsweetened applesauce
a dash of cinnamon (optional)
your favorite toppings- berries, maple syrup, peanut butter, jam, chocolate chips... whatever you like!


Preheat a griddle or frying pan over medium heat and lightly grease with cooking spray.

In a small bowl microwave oats with slightly less than 1/2 cup water for approximately 1 minute and 30 seconds, until the water has been absorbed and your oats are nice and creamy.

Add 1/4 of a banana and mash it into the oats. Add applesauce, pancake mix, and milk and combine. Slice the rest of your 1/2 banana into the batter, or save to top your cakes with after they've cooked. If desired, add a dash of cinnamon, and even toss in a few chocolate chips for an extra special treat (with the healthiness of this recipe, you deserve it!). 


Pour 1/4 cup batter into griddle, making 3 small cakes. Heat for a couple minutes on first side, until bottom has nicely browned, then flip and do the same. These cakes aren't your typical pancake texture and remain moist and creamy in the middle, so even if they don't seem cooked through since they aren't dry and fluffy, they really are. 


Serve with your favorite topping, I use strawberries, banana, and maple syrup. Enjoy warm and straight off the griddle!


Friday, November 18, 2011

Lemon Blueberry Coffee Cake

A twist on my all-time favorite coffee cake recipe (Two Dudes One Pan's Sour Cream Coffee Cake), this Lemon Blueberry Coffee Cake is the perfect morning indulgence to take you to a temporary bright-and-delicious coffee cake fantasy world, and help you forget the cold, rainy and gray weather going on outside. The juicy blueberries and vibrant lemon zest are the perfect accompaniment to the melt-in-your-mouth sour cream cake and buttery sweet crumble topping. 

Lemon Blueberry Coffee Cake

Ingredients
for streusel topping:
1/2 c granulated sugar
1/4 c all-purpose flour
1/4 tsp salt
2 tbsp unsalted butter, melted

for cake:
3/4 c unsalted butter, at room temp
2 c all-purpose flour
1 1/2 tsp baking powder
1/4 tsp baking soda
1/2 tsp salt
3 eggs
2 tsp vanilla extract
1 c granulated sugar
1 c sour cream
2 c blueberries
zest of half a lemon

Preheat oven to 350 deg F. Grease a 9 x 13 inch pan.

To make streusel, mix sugar, flour and salt in small bowl. Add in butter, mix in with a fork until you have little chunks.

In a medium bowl, whisk flour, baking powder, baking soda, salt, and lemon zest. Whisk eggs, 2 tbsp water and vanilla in a small bowl and set aside. 

In a large bowl, cream butter and sugar together until pale yellow and fluffy. Add sour cream in two additions. Add 1/3 of dry ingredients, then 1/2 of liquid, mixing until nearly incorporated. Add 1/2 or remaining dry, rest of liquid, and rest of dry, mixing until fully incorporated. Fold in blueberries.

Pour batter in pan and top with streusel. Bake 35-40 minutes, until a toothpick comes out clean.


How can you go wrong with buttery-golden berry deliciousness?


Wednesday, November 16, 2011

Pumpkin Pie Bars...holiday baking at its finest


I know I've posted an excess of pumpkin recipes lately, but it's the holidays and with Thanksgiving just a week away, who can blame me? When it comes to pie, no questions asked, I'm for pumpkin all the way. These pumpkin pie bars brought my appreciation for pumpkin pie to a whole new insanely delicious level. With a moist, almost cheesecake like pumpkin filling nestled between a buttery crust, crunchy topping, and sweet white chocolate chips, this really is a new, and very successful, twist on classic pumpkin pie. I couldn't thank one of my new favorite blogs, Annie's Eats, enough for introducing me to this fabulous recipe.


Pumpkin Pie Bars
original recipe

Ingredients
For the crust and topping:
1 1/2 c all-purpose flour
1/4 c granulated sugar
1/2 c brown sugar
12 tbsp cold unsalted butter, cubed
1 c old-fashioned oats
1/2 c chopped pecans (optional)

For the filling:
8 oz cream cheese, softened
1/2 c granulated sugar
3 eggs
1 15 oz. can pumpkin puree
1 tbsp pumpkin pie spice
1 tsp vanilla extract

Butterscotch, white chocolate, or semi-sweet chocolate chips for topping

Preheat oven to 350 deg F. Line a 9 x 13 inch pan with foil, extending over the edges of the pan. Lightly grease foil.

Combine flour and sugars in a small mixing bowl. Add pieces of butter and cut in with a pastry blender until mixture resembles coarse crumbs. Stir in oats and chopped pecans.

Reserve 1 c of crust mixture and set aside. Add remaining crust mixture to pan and press evenly onto the bottom. Bake crust alone for 15 minutes, preparing filling while it is baking.

To make filling, combine cream cheese, sugar, eggs, pumpkin, pumpkin pie spice, and vanilla in a medium bowl. Mix until smooth and well combined. Once crust is done baking, evenly spread filling over crust. Sprinkle with reserved crust mixture and chocolate chips, as desired. Bake for 25 minutes, and transfer to a wire rack to cool completely, using foil overhang to lift bars out when ready to slice.


Don't the white chocolate chips look like mini toasted marshmallows?

Sunday, November 13, 2011

Chocolate Chip Butterscotch Pumpkin Squares

After an unsuccessful attempt at crustless- pumpkin pie bars, I decided to toss out the strange idea of a hand-held pumpkin pie and stick to a more traditional pumpkin dessert (however, I did find a very promising recipe for pumpkin pie bars, this time WITH crust, that should be making an appearance on the blog shortly!). When in doubt, one should always go to a proven source, so who other than Martha Stewart to turn to? An obvious choice for a classic pumpkin dessert- Martha Stewart's Pumpkin Chocolate Chip Squares. Some reviewers commented that they were similar to a pumpkin blondie, but I found them to be lighter than typical blondies, and more of a moist pumpkin cake or really fluffy bread.

Having recently discovered my love for butterscotch chips (how I never tried them before I do not know), I tossed in a few of those along with the semi-sweet chocolate chips. Following recommendations, I cut back on the chocolate (and butterscotch) chips to a total of 1 cup, rather than 12 oz as the original recipe calls for. I also replaced a quarter of the butter with applesauce, although next time I may replace more, after reading that they were overwhelmingly buttery and moist. I know there are plenty firm believers that this isn't possible, but I figured I'd take their advice. I really don't think the applesauce takes away from the squares at all, and why not feel a little better about yourself for eating dessert!

Delicious! Martha, you never fail to disappoint.


Chocolate Chip Butterscotch Pumpkin Squares
original recipe- Martha Stewart

Ingredients
2 c all purpose flour
1 tbsp pumpkin pie spice
1 tsp baking soda
3/4 tsp salt
12 tablespoons unsalted butter
4 tablespoons unsweetened applesauce
1 1/4 c sugar
1 egg
2 tsp vanilla extract
1 c canned pumpkin puree
1/2 c semi-sweet chocolate chips
1/2 c butterscotch chips

Preheat oven to 350 deg F. Line bottom and sides of a 9 by 13 inch pan with foil, leaving an overhang on all sides.

In a medium bowl, mix flour, pumpkin pie spice, baking soda, and salt. Set Aside.

Cream butter and sugar in a large bowl until smooth, beat in egg and vanilla. Add in pumpkin puree. Slowly mix dry ingredients into wet until just combined. Fold in chocolate and butterscotch chips.

Evenly spread batter in prepared pan. Bake 35 to 40 minutes, until a toothpick comes out clean. Cool completely in pan. Using foil overhang, lift cake from pan and cut into desired size.

Friday, November 11, 2011

Peanut Butter Banana Oatmeal Muffins... the perfect breakfast to-go


Finally, muffins you can feel good about eating! Or if not good, then at least better than you normally would... The perfect breakfast packed into a little piece of morning heaven. Not too sweet and loaded with nutritious yet tasty bananas, peanut butter, and oatmeal (covering all our important food groups here!), these will definitely become my go-to recipe for when I'm craving something a little more special than my standard yogurt breakfast, but don't want to start my day with a diet-buster. Oh, and of course I had to add in a handful of chocolate chips, typically not considered part of a healthy meal, but just a little chocolate to start out the day can't hurt.

The original recipe calls for applesauce and low fat buttermilk, neither of which I had at the moment, so I used oil and my own buttermilk creation (1 tablespoon white vinegar per 1 cup milk). However, I'm a huge proponent of baking with applesauce whenever possible, and highly doubt that these muffins would be any less moist or delicious using applesauce due to the generous amounts of tasty peanut butter and banana already included.


These really reminded me of the Peanut Butter Chocolate Chip Oatmeal cookies I made last week, which isn't surprising considering they had almost exactly the same main ingredients. They had the same pretty, pale-golden color and smooth pillow-like exterior.


Peanut Butter Banana Oatmeal Muffins
original recipe- annie's eats
makes approximately 18 muffins

Ingredients
1 1/2 c all-purpose flour
1 c old-fashioned oats
1 tsp baking powder
1/2 tsp baking soda
1/2 tsp salt
2 tbsp unsweetened applesauce (or oil if you prefer)
3/4 c light brown sugar
2 large eggs
1 c mashed bananas (about 3 bananas)
6 tbsp creamy peanut butter
1 c low-fat buttermilk
1/2 to 1 c chocolate chips if desired

Preheat oven to 350 deg F. Grease or line 18 muffin cups.

In a medium bowl, combine flour, oats, baking powder, baking soda, and salt.

In a large bowl, whisk together applesauce, brown sugar, eggs, banana, peanut butter, and buttermilk until smooth.

Pour dry ingredients into wet and mix until just incorporated. Fold in chocolate chips.

Divide batter among muffin cups, and bake 18-20 minutes, until a toothpick inserted in the center comes out clean. Allow to cool in pan for 5-10 minutes, then transfer to a wire rack. Eat warm and with a glass of milk, if that's your thing (personally, I can't stand milk but can imagine it would be a perfect pairing with these muffins if you do like it)!!!

Wednesday, November 9, 2011

Chocolate Pecan Pie Bars-Thanksgiving, here we come!

Deciding to try something new for Thanksgiving, I came across this recipe for chocolate pecan pie bars and immediately considered it a contender for the competitive prize of a position on my Thanksgiving menu. I've never had pecan pie before, and I'm not the biggest fan of nut-based desserts (unless it's peanut butter, of course), but the chocolate addition in these bars drew me in. I also much rather prefer a layer of crunchy crust to traditional pie crust which I feel takes away from the deliciousness of pie filling with its doughy-blandness, another reason why this recipe spoke to me. Basically, with my slew of complaints, what I'm trying to say is pecan pie doesn't sound all that great to me, but as if the recipe was created in my honor, these bars totally undid all that was unappealing and replaced it with everything I love.

Crunchy shortbread-like crust and sticky, sweet-and-salty pecan and chocolate filling make these bars ultra-decadent and definitely converted me into a pecan pie (or at least bar) fan. I'm very happy to have found a new addition to my Thanksgiving repertoire!


Chocolate Pecan Pie Bars

Ingredients
for the crust:
1 1/2 c all-purpose flour
1/2 c unsalted butter, softened
1/4 c packed brown sugar

filling:
3 large eggs
3/4 c corn syrup
3/4 c granulated sugar
2 tbsp butter, melted
2 tsp vanilla extract
1 3/4 c coarsely chopped semisweet or bittersweet chocolate, or chocolate chunks/chips
1 1/2 c chopped pecans

Preheat oven to 350 deg F. Grease a 9 x 13 in. baking dish.

For the crust: Mix flour, butter, and brown sugar until crumbly. Press into prepared pan and bake for 12-15 minutes until lightly brown.

For the filling: Beat eggs, corn syrup, sugar, butter, and vanilla extract. Stir in chocolate and pecans. Pour evenly over the baked crust and bake for 25-20 minutes, or until set.

Cool in pan on wire rack completely before cutting into bars. I advise eating these with one hand and holding a toothbrush in the other. They are so sweet you feel the cavities coming on immediately! Not to mention their sticky-goodness will give you a chocolate pecan-filled smile. But these tiny troubles are completely worth the deliciousness that is these bars.

These chocolate pecan pie bars really are the perfect, easy addition to any Thanksgiving or holiday menu!

White Chocolate Mocha Cookies


What better cookie for a coffee shop than a coffee flavored one! I love everything coffee and chocolate, and these cookies combine the best of both worlds. The bold flavor of the espresso is perfectly balanced by sweet, melty pockets of white and semi-sweet chocolate chips, and the cookies have a moist, almost brownie-like center. When you really want to treat yourself, swap your morning cup of coffee for one of these and you'll be going strong all day long!

White Chocolate Mocha Cookies
original recipe- budding baketress
makes 1-2 dozen cookies

Ingredients
2 1/2 c all purpose flour
3 tbsp instant coffee granules (I used 1 1/2 tablespoons of espresso grinds instead)
3/4 tsp baking powder
3/4 tsp baking soda
3/4 tsp salt
1/2 c unsweetened cocoa powder
1 c unsalted butter, at room temp
1 1/4 c granulated sugar (The espresso grinds were very bitter, so increased my sugar to 1 1/2 c)
3/4 c brown sugar
2 large eggs
1 tbsp vanilla extract
1 c semi-sweet chocolate chips
1 c white chocolate chips

Preheat oven 375 deg F. Lightly grease or line two baking sheets with parchment paper.

In a large bowl, mix flour, instant coffee (or espresso), baking powder, baking soda, salt, and cocoa. Set aside.

In a large bowl beat butter until fluffy. Add sugars and mix until incorporated. Add eggs one at a time, beating well after each addition, then add in vanilla.

Slowly add flour mixture to butter and mix until just incorporated. Fold in semi-sweet and white chocolate chips. Scoop dough into tablespoon (or larger...) sized balls and place 2 inches apart on baking sheet. Bake 9-10 minutes. Cool 5 minutes on baking sheet, then transfer to wire rack to cool completely. Best enjoyed while still hot and ooey-gooey fresh out of the oven!

Thursday, November 3, 2011

Peanut Butter Chocolate Chip Oatmeal Cookies- "The 3-in-1 Cookie"


Peanut butter, chocolate chip, and oatmeal... the three most loved, baked, and eaten cookies in existence. We've all been faced with the torturous dilemma of having to choose just one of these three yummy treats to eat, or giving in to cookie-pressure and buying all three, quickly shoving two of them in your bag or pocket (or mouth...) to prevent possible social isolation and/or harassment as a result of your cookie addiction. What if I told you that I've found the solution to your cookie conundrum? Well, it's true! Now we can eat all three cookies in just one moist, gooey, buttery, delicious, and not to mention possibly the prettiest, package of cookie paradise. 


All of my troubles were answered with the discovery of this recipe for Peanut Butter Chocolate Chip Oatmeal Cookies, and I guarantee that yours will be too if you make these unbelievably, insanely, knock-your-socks-off tasty cookies. 

Peanut Butter Chocolate Chip Oatmeal Cookies
makes 2-3 dozen cookies 

**I actually quadrupled the original recipe when I baked them. Believe me, you'll want A LOT of these. But I'm guessing most people probably don't want 5 dozen cookies laying around their house, so this recipe makes a more realistic amount.


Ingredients
2 c all-purpose flour
2 tsp baking soda
1/2 tsp salt
1 c unsalted butter, at room temp
1 c creamy peanut butter
1 c granulated sugar
2/3 c light brown sugar
1 tsp vanilla extract
2 eggs
1 c rolled oats
2 c semisweet chocolate chips

Preheat oven to 350 deg F. Line two baking sheets with parchment paper and set aside.

Whisk together flour, baking soda, and salt. Set aside.


Cream together butter, peanut butter, sugars, and vanilla for about 3 minutes. Add eggs and beat to combine. Gradually add in flour mixture until just combined. Fold in oats, then chocolate chips.


Form dough into large balls, approximately 3 tablespoon sized, and drop onto prepared baking sheets 2 inches apart. Bake 10 minutes, until lightly golden. Cool completely before storing in an airtight container, but DEFINITELY eat one while it's fresh out of the oven. You won't be sorry!


Wednesday, November 2, 2011

Basic Banana Chocolate Chip Muffins

"It's healthy...it's bananas!". Without a doubt, the ultimate classic breakfast treat is moist, slightly chewy, sweet banana bread. The fact that it was even once considered a nutritious meal only served to increase its popularity. Despite our admittance (sadly) of its true nutritional qualities, or rather lack of, banana bread still holds a place in our hearts. Bake it in smaller, cuter muffin form and toss in generous cupfuls of chocolate chips, and it holds an even bigger place... or at least it does in mine! Having only ever baked vegan banana bread (a Babycake's recipe that I still love and happens to only be a slightly different vegan-ified version of this one), I figured it would be nice to try something different, and discovered this ultra-basic, easy to make banana chocolate chip muffin recipe.


Basic Banana Chocolate Chip Muffins
makes 24 muffins

Ingredients
3 cups all-purpose flour
2 tsp baking powder
2 tsp baking soda
1 tsp salt
2 tbsp cinnamon
6 large bananas, mashed
1 1/2 cup white sugar
2 eggs
2/3 cup unsalted butter, melted
1 cup chocolate chips

Preheat oven 350 deg F. Coat muffin pans with non-stick spray, or use paper liners. Mix together flour, baking powder, baking soda, salt, and cinnamon, and set aside.

Combine bananas, sugar, eggs, and melted butter in a large bowl. Fold in flour mixture until just incorporated. Fold in chocolate chips. Pour in muffin pans.

Bake 25- 30 minutes. Muffins will spring back when lightly tapped. Enjoy warm!

Tuesday, October 25, 2011

Pumpkin Cream Cheese Muffins... a sweet surprise


Spicy pumpkin and sweet cream cheese frosting; one of the best combinations out there, but one I've done plenty of times before. Rather than baking a pumpkin loaf and smearing generous globs of cream cheese frosting on top (and all over the sides so it falls off and I get to scoop it into my mouth using every last one of my fingers), I wanted to take a new approach, and settled on what seems to be a recent craze- pumpkin muffins with a cream cheese filling. I know they're the same flavors as your regular old frosted pumpkin loaf, and not that big of a change, but something about the unexpected bite of sweet, creamy, slightly tangy cream cheese mixed with spicy, moist pumpkin-y goodness makes these Pumpkin Cream Cheese Muffins taste above and beyond what any loaf ever could.

Judging by photos of the original recipe, the cream cheese was supposed to be more of a solid hunk of filling in the center rather than melty, unevenly dispersed pockets of sweetness like mine were. This is probably, no definitely, due to my lack of freezing time before placing the filling in the muffin tins to be baked. Either way, it tasted great and I'm sure no different than the originals, except maybe in those you get bigger hunks of filling, which honestly, I don't think I'd like as much as little tastes here and there.


Pumpkin Cream Cheese Muffins
makes 24 muffins

Ingredients
for the filling:
8 oz cream cheese, softened
1 c confectioners' sugar
1 tsp vanilla extract

for the muffins:
3 c all-purpose flour
1 tbsp cinnamon
1 tsp nutmeg
1 tsp salt
1 tsp baking soda
4 large eggs
2 c sugar
2 c pumpkin puree
1 1/4 c vegetable oil
*original recipe called for a wider variety of spices, but I didn't have them. I don't think they're necessary and am happy with my cinnamon-nutmeg combo but feel free to add more as you please

for the topping:
1/2 c sugar
5 tbsp flour
1 tbsp ground cinnamon
4 tbsp cold unsalted butter, cut into pieces

To prepare filling, combine cream cheese, confectioners' sugar and vanilla in a medium bowl and mix until well blended. Transfer mixture to a piece of plastic wrap, and shape into a log 1 1/2 inches in diameter. Smooth plastic wrap around filling, reinforce with a piece of aluminum foil, and transfer to freezer to chill until at least slightly firm, at least 2 hours.
*as previously mentioned, this is the part I skipped, freezing my filling for maybe 40 minutes. Instead of cutting it into slices and placing it in the muffin tins as the recipe later calls for, I just spooned in equal amounts of frosting per muffin. Totally up to you, freezing makes it an easier, less messy process, but I like the uneven distribution mine turned out to have.

Preheat oven to 350 deg F. Line or grease muffin pans. In a medium bowl, combine flour, cinnamon, nutmeg, salt, and baking soda. In a separate, larger bowl, combine eggs, sugar, pumpkin puree and oil. Slowly add in dry ingredients until just incorporated.

To make topping, combine sugar, flour, and cinnamon in a small bowl. Add in butter and mix until coarse and crumbly.

Fill each muffin well with just enough batter to cover the bottom (1-2 tbsp). Slice (or spoon) log of cream cheese filling into 24 equal pieces, placing in each individual muffin tin. Divide remaining batter among muffin cups, covering cream cheese filling completely. Sprinkle with topping.

Bake 20-25 minutes. Transfer to a wire rack and cool completely before serving. Be careful when removing your muffins from their tins! They are very delicate with the cream cheese centers, and a couple of mine split due to my removing them too roughly/not allowing them enough time to cool.

Tuesday, October 18, 2011

Berry Burst Muffins... berry berry good

Coffee connoisseurs and my fellow coffee shop employees who may possibly be reading this, look away!

.........I like Starbucks


Yes I know, Starbucks is the McDonalds of coffee shops, the tyrant of the kingdom of cafes, the demise of all things pure, honest, and desirable about coffee, yadayada... However, while in no way am I opposed to everyone having their own opinions, and yes, I do agree Starbucks has taken over the land-of-beans (coffee that is), I continue to, and will continue to, support this business because well, it's convenient and honestly, I don't think it tastes all that bad either.

I will admit to frequent visits to the coffee giant in between classes, when, on those days I'm on campus for nearly 12 hours straight, I need a mid-day/early evening pick me up. It just so happens that Starbucks is a block away from my classes, so why not take advantage? I will also confess that at times, along with my coffee concoction or cup of tea, I can't resist a taste of something sweet from their bakery case. My go-to pick for those days I just can't pass a treat up? Reduced-Fat Very Berry Coffee Cake. Partly because it makes me feel less guilty, partly because I like berries and coffee cake, and partly because I'm a person of routine and am too scared to try something new. I doubt it is freshly made, or from scratch, and they probably mass produce their baked treats and defrost them to sell, but what I don't know can't hurt me/tarnish my image as "true" baker and baked good eater (whatever that means), right?

To make things even worse for those of you already questioning my qualifications as a reliable source of baking/cooking/eating adventures, this Starbucks coffee cake is where I got the inspiration for my latest coffee shop baking experiment-Berry Burst Muffins. I will, however note that I have no idea what the recipe for Starbucks' coffee cake is, so in no way did I recreate their dessert, it just gave me the idea.


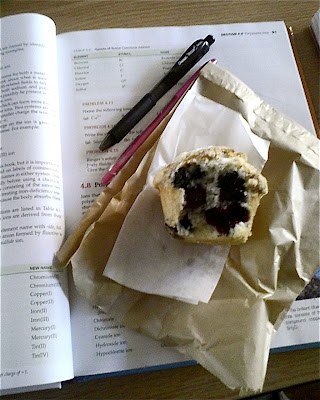
I adapted a recipe I've used in the past for blueberry streusel muffins, adding in blackberries and lemon zest for an extra pop of flavor. They came out moist, sweet, tangy, and perfectly crunchy on top. Thank you Starbucks.

Ignore the, yet again, subpar pictures. I forgot to bring my camera to work so had to use my horrible quality cellphone camera.

Berry Burst Muffins
makes 14 good-sized muffins


Ingredients
3 c all purpose flour
1 1/2 c granulated sugar
1 tsp salt
1 tbsp+ 1 tsp baking powder
2/3 c vegetable oil
2 eggs
2/3 c milk
2 c mixed berries (blueberry, blackberry, raspberry...)
zest of 1 lemon

for topping:
1/4 c granulated sugar
1/6 c all purpose flour
1/8 c unsalted butter, cubed

Preheat oven 400 deg F. Grease/line 14 standard sized muffin cups. These muffins spill over the edge slightly, especially with the streusel topping, so I advise greasing around the muffins cups along with lining/greasing inside muffin cups.

Combine flour, sugar, salt, baking powder, and lemon zest in large bowl. Place vegetable oil in a measuring cup, add eggs and enough milk to fill to the 2 cup mark. Mix into flour mixture. Fold in berries. Fill muffin cups to the top.

For streusel topping- mix sugar, flour and butter until crumbly. Sprinkle over muffins before baking.

Bake 20-25 minutes until toothpick comes out clean.

Yummy muffins make chemistry more enjoyable

Sunday, October 16, 2011

This College Girl Cooks: Salmon Salad (Salad?)

Being a pescatarian, canned tuna has been a staple protein in my diet for quite some time. However, once I find a food I like, I stick with it for a very long time, and as a result have eaten a rotation of just a handful of meals every day for the past who knows how many years. Finally, after tireless requests from my mother to eat a wider variety of food, I introduced canned salmon to my diet (big change right?). Luckily, we were all happy! I changed up my food routine (and cut down on my chance of getting mercury poisoning...) like my mom wanted, and I happen to love salmon, but for some reason hadn't paid much attention to it in canned form. One of my favorite methods of preparation, besides slapping it down on a piece of toast, is placing a large scoop of it over a beautiful, healthy salad. I'm unsure of what to call this dish, seeing that usually tuna salad describes canned tuna mixed with a variety of condiments, so I'm guessing salmon is the same. But when you lay this salmon salad on top of an actual salad (lettuce, tomatoes, etc... you know what I mean), does it become a salmon salad salad? Either way, it's easier and sounds better to just call it Salmon Salad, so I'll stick with that.

Salmon Salad
Ingredients
1 can salmon
ketchup
mayonnaise
pickle relish
black pepper
finely diced red onion
your favorite salad fixings


In a small bowl, mix together canned salmon, 2-3 tablespoons mayo, 1 tablespoon ketchup, a heaping spoonful of relish, generous sprinkle of black pepper (freshly ground if you have it), and a teaspoon or two of diced red onion until homogeneous. *

*Note: These measurements are approximate. Depending on your tastes, you may want to add more or less of each ingredient (more mayo for added moistness, ketchup for sweetness etc.)


Prepare your favorite salad. Mine had mini heirloom tomatoes, cubed avocado, and edamame on a bed of romaine lettuce. 


Place a generous scoop of salmon on top of your salad. You may want to add a drizzle of your favorite salad dressing for extra flavor. Enjoy for lunch or dinner!

Wednesday, October 12, 2011

Apple Crumb Cake. A new (more exciting) way to get your apple a day

I'm definitely an apple lover, so that saying "an apple a day keeps the doctor away" regardless of the fact that it may not actually be true, is something I happily live by. I make what may be the best apple crumble in existence, if I do say so myself (trying to hold off on baking it until further into fall or if possible, winter, when I can guiltlessly curl up with a big bowl of it al-a-mode because it's freezing and depressing outside), and have even gotten in a fight with my boyfriend over apple vs. cherry pie (no offense to cherry enthusiasts, but I'm not a fan), so yea, basically I love apples.

However, sadly, besides my apple crumble, I'm severely lacking in apple recipes, and felt that I needed to make up for this and bake something apple-y and delicious ASAP. As if it were fate, I stumbled across a very promising yet unexpected recipe for an apple coffee cake with crumb topping by Emeril Lagasse, not someone I've ever really associated with baked goods, but that was my mistake! Moist, sweet, with pockets of soft apple pieces and a thick, crumbly, sugary layer of topping, I'm happy to say I've finally added a new recipe to my apple repertoire.


I know it's not a very good picture, and definitely doesn't do the recipe justice. But it was at work where I have limited photo taking space and I had to rush to class, so there's a good reason for the bad quality. Sorry...

Apple Crumb Cake

Ingredients
1 stick unsalted butter, room temp
1 1/2 c packed light brown sugar
2 large eggs
2 c all purpose flour
1 tsp baking soda
2 tsp ground cinnamon
1/2 tsp salt
1 c sour cream
1 tsp vanilla extract
2 c peeled, cored, chopped apples

for crumble topping:
1/2 c packed light brown sugar
1/2 c all purpose flour
1/2 tsp ground cinnamon
4 tbsp unsalted butter, softened

Preheat oven to 350 deg F. Grease a 13 x 9 baking dish and set aside.

In a large bowl, cream together butter and sugar until light and fluffy. Add eggs one at a time, beating after each addition. 

In a separate bowl, mix together flour, baking soda, cinnamon, and salt. Add to butter mixture, alternating with sour cream and vanilla. Fold in apples. Pour into pan and spread in an even layer.

To make topping mix sugar, flour, cinnamon and butter in a bowl until crumbly. Sprinkle over cake and bake until golden brown, 35-40 minutes. Serve warm.

Saturday, October 8, 2011

Chewy and Sweet Snickerdoodle Blondies with Maple Glaze

As of two weeks ago, I've been working part time as a barista at a coffee shop on campus. While the perk of being able to make cup after cup of my own original coffee creations definitely makes an already enjoyable work shift in-between running from one class to the next even better, the fact that I was given the opportunity to once a week bake whatever I desire that would then be sold in the cafe is that much more amazing.

I immediately created an extensive list of all of the things I wanted to bake after finding out what my job entailed. Because I would be provided with all necessary ingredients, have enough hungry and eager customers to eat my creations instead of trying to restrain myself from gobbling up an entire pan on my own, and not to mention be paid to bake rather than scrounge together the amount of money it would take to bake this frequently from an already dismal college student's budget, I finally had the chance to experiment and make all of the things I otherwise may have had to wait a long time to try.

There are a few criteria I decided my recipes should meet if I was going to be selling them in the cafe. First off, it has to be easy enough to make within a 2 hour time frame and in a kitchen which I don't have any (and still not much) experience in. That meant probably no yeast breads requiring resting time, complicated kneading, rolling out techniques etc... that I haven't had a lot of practice at and/or are time consuming, or extensive cooking, overnight chilling, or cooling times. Secondly, it has to be a large enough size to attract customers. At home I can easily get away with tiny cookies or muffins and bite-sized cinnamon rolls, but for the most part, I associate coffee shop sweets as being bigger than the norm. Finally, it has to be appealing to the majority of my customers, in this case the average college student. I guess that means less low-fat vegan muffins and green tea flavored goodies and more of your traditional coffee cake, cookie, muffin, and bar type desserts, preferably ones that go well with coffee.

My first week I made scrumptious lemon blueberry coffee cake, but unfortunately forgot my camera and therefore was not able to post. However, I will be making this at home in the near future... post coming soon!


Following this set of criteria, for my second week of baking I decided on a recipe for Snickerdoodle Blondies from one of my most loved blogs, Bakergirl. Personally, I've never been a snickerdoodle cookie fan and have never even tasted a blondie in my life (how can one eat blondies when there are brownies in this world??? or so I thought). But based on my list of guidelines, and the fact that the photos of them on the Bakergirl blog looked amazing, I figured that super sweet, cinnamon-y snickerdoodles combined with the moist, chewiness of a blondie would be perfect. To make them even more over-the-top sweet and decadent, I added a generous drizzling of maple glaze, but unfortunately, probably because I used maple syrup instead of extract, it didn't have much maple flavor.

Despite the fact that the glaze didn't turn out as planned and if I were to make them again, which I'm sure I will, I most likely won't even include a glaze topping, these blondies were fantastic. Chewy, moist, sweet, and cinnamony, they're 50 times better than any snickerdoodle cookie I've had and if this is what all blondies taste like, I've been missing out.


Snickerdoodle Blondies with Maple Glaze
original recipe courtesy of Bakergirl

Ingredients
2 2/3 c all purpose flour
2 tsp baking powder
1 tsp salt
1 tsp cinnamon
1/4 tsp ground nutmeg
2 c packed brown sugar
1 c unsalted butter, at room temp
2 eggs
1 tbsp vanilla extract

for topping
2 1/2 tbsp granulated sugar
2 tsp cinnamon

for maple glaze**
1 c powder sugar
1/8 tsp maple extract
1/4 c milk

**Honestly, with the cinnamon-sugar coating sprinkled on top, a glaze really isn't necessary. But if you are looking for an extra dose of sweetness (be warned, they are already plenty sweet, so this addition should only be used for extreme sugar-addicts!) then it is definitely a good addition. Using maple extract rather than maple syrup is a much better route to take for true maple flavor.

Preheat oven to 350 deg F. Spray a 9x13 inch baking pan with cooking spray.

In a medium bowl, whisk flour, baking powder, salt, and spices. Set aside.

In a large bowl cream butter and brown sugar until fluffy, about 5 minutes. Add eggs one at a time, beating well after each. Mix in vanilla.

Slowly add flour mixture to butter, beating until just combined. Transfer dough to prepared pan and spread in an even layer. Combine granulated sugar and 2 tsp cinnamon in a small bowl and sprinkle evenly over top of batter.

Bake 20-25 minutes, until the surface of the blondies spring back when gently pressed. If using glaze, prepare it by mixing all ingredients together while blondies are baking.

Remove blondie pan and set on wire rack to cool slightly, then drizzle with glaze. Cool completely before cutting.


Cut a piece before they cooled completely due to my impatience. Why it's falling apart a bit. 

These sweet treats sold out in just one afternoon! Might have to bring them back for special guest appearances from time to time.

Friday, October 7, 2011

This College Girl Cooks: The Picturesque Breakfast Sandwich

When it comes to breakfast I'm 100% for fruit and yogurt parfaits. However, there are rare occasions when I'm in the mood for something other than the same breakfast I've eaten almost every morning for the past 4 years. This usually happens when I'm craving a breakfast-for-lunch type meal, and today was one of those days. Rather than make my standard peanut butter and jelly on toast for lunch, I decided to try something new, partly due to the fact that I had an opened carton of egg-whites in my fridge that I didn't want to go bad and be wasted. Hence my healthier, fresher, and tastier twist on a greasy, bland Egg McMuffin-type sandwich was born.


How can someone settle for a soggy english muffin, frozen egg patty and rubbery cheese sandwich when they can have one of these?!

The Picturesque Breakfast Sandwich


1 toasted english muffin of your choice
1 or 2 scrambled egg/ egg-whites
a small handful of chopped cherry or mini-heirloom tomatoes
spinach
2 mushrooms, sliced
salt, pepper, garlic powder, dried thyme or your choice of seasonings
cheese and ketchup, if desired

While your muffin is toasting, sauté tomatoes, spinach, and mushrooms together in a small fry pan. Add eggs and seasonings and scramble over low heat. If using cheese, either scramble it into your eggs to melt it together with the rest of your ingredients or lay it on top until it begins to melt. Spread ketchup on english muffin (not necessary but I happen to LOVE ketchup and generously smothered my english muffin with it). Place scramble on egg, put top of english muffin on, and dig in!

Wednesday, October 5, 2011

Melt in your mouth Peanut Butter Cookies

Whether it's eaten on bread with jam (preferably strawberry), in a bowl mixed with honey and banana, nestled inside a chocolate cup, or as spoonfuls straight out of the jar, peanut butter is just plain amazing. While all of the previously mentioned ways of eating peanut butter are great, we can't forget what is possibly the tastiest and most indulgent methods of peanut butter consumption- freshly baked peanut butter cookies.

Crunchy on the outside, unbelievably moist and melt-in-your-mouth on the inside, with crunchy peanuts and soft, sweet chocolate morsels throughout, I think I've found what may be the ultimate recipe for this classic cookie.


Peanut Butter Cookies
makes approx. 3 dozen cookies (or less if you make them gigantic like I do)


Ingredients
1 1/3 cups all-purpose flour
1/2 tsp baking soda
8 tablespoons unsalted butter, softened
1/4 cup packed dark brown sugar, or 1/2 cup packed light
3/4 cup granulated sugar with dark brown sugar, or 1/2 cup with light
1/2 tsp salt
1 large egg
1 tsp vanilla extract
1 1/4 cups chunky peanut butter
1/2 to 1 cup each chocolate chips and whole peanuts (more or less depending on how much chocolate/texture you like)

Mix flour and baking soda in a medium bowl and set aside.

In a large bowl cream butter, sugars, and salt until smooth and creamy, not fluffy. Add egg, vanilla, and peanut butter and mix until homogeneous. Add in flour mixture, chocolate chips, and peanuts and mix just until incorporated. Wrap and refrigerate dough for at least 2 hours, preferably 12.

Preheat oven to 325 deg F.

Form dough into 1 1/4 inch balls (or bigger...) and place 2 inches apart on cookie sheets. Flatten each ball to a thickness of slightly less than 1/2 inch with a fork, pressing the back of the tines into the dough in two directions. Bake 14-16 minutes, until slightly colored on top and golden brown underneath. Cool completely before stacking or storing but they're best eaten when warm!